

Launching a business on social media often looks simple: create a Facebook Page, open an Instagram account, upload your logo, write a short bio, and start posting.
But a professional social presence requires more preparation.
Before publishing your first post, your business should have a clear identity, consistent visual assets, accurate profile information, defined messaging, and a system for managing content across different platforms.
Without that foundation, businesses often end up with different usernames, mismatched logos, inconsistent colours, unfinished profiles, random post designs, and messaging that changes from one platform to another.
A structured brand setup for social media helps prevent these problems from the beginning.
This step-by-step checklist explains how new businesses can build a social media presence that looks professional, recognizable, consistent, and ready for long-term marketing.
Why Social Media Brand Setup Should Come Before Content Creation
New businesses are often eager to start publishing.
That is understandable. Social platforms offer immediate access to potential customers.
But posting before establishing your brand system can create unnecessary problems.
Imagine publishing 50 posts and then deciding that:
- Your brand colours need to change
- Your logo does not work well on social media
- Your username is inconsistent
- Your messaging is unclear
- Your graphics have no recognizable style
- Your company description needs to be rewritten
You may have to redesign everything.
A better approach is to build the foundation first.
Your social media branding should connect with your overall business identity, website, advertising, sales materials, and customer communication.
If your business does not yet have this foundation, developing a clear brand strategy should come before designing dozens of social posts.
M4YOURS IT’s Brand Strategy & Foundation service similarly focuses on positioning, messaging, audience alignment, value proposition, and identity frameworks before broader visual implementation.
Step 1: Define Your Brand Positioning
Before choosing Instagram templates or designing a Facebook cover, clarify what your brand represents.
Ask:
- What does our company do?
- Who do we serve?
- What problem do we solve?
- Why should customers choose us?
- How should people describe our brand?
- What makes us different from competitors?
These answers influence almost everything that comes afterward.
For example, a premium corporate consultancy and a youth-focused fashion brand should not communicate in exactly the same way.
Their:
- Visual direction
- Tone
- Photography
- Content
- Typography
- Messaging
- Calls to action
will naturally differ.
Create a simple positioning statement
A useful internal statement can follow this structure:
We help [target audience] achieve [desired result] through [product/service or approach].
This statement does not necessarily need to appear publicly.
Its purpose is to keep your marketing team focused.
Step 2: Define Your Target Audience
Trying to communicate with everyone usually creates generic branding.
Instead, identify the customers you actually want to reach.
Document basic audience characteristics such as:
- Customer type
- Location
- Industry
- Age range where relevant
- Main needs
- Common problems
- Buying motivations
- Questions they frequently ask
- Platforms they commonly use
A B2B software company may prioritize LinkedIn.
A visual lifestyle brand may invest more heavily in Instagram.
A local service business may depend strongly on Facebook and messaging platforms.
You do not need to be active everywhere.
Start where your target audience and business goals overlap.
Step 3: Choose the Right Social Media Platforms
One of the most common mistakes new businesses make is creating accounts on every available network.
Five abandoned profiles are rarely better than two well-managed profiles.
Choose platforms based on:
- Your audience
- Your content capabilities
- Your products or services
- Your marketing objectives
- Your available resources
For many businesses, the initial platform mix might include:
Useful for business information, community engagement, advertising, messaging, events, promotions, and different forms of visual content.
Strong for visual branding, products, lifestyle content, short-form video, stories, portfolios, and brand storytelling.
Particularly relevant for B2B companies, professional services, recruitment, corporate communication, and thought leadership.
LinkedIn recommends completing business Page information such as the logo, cover image, overview, website, location, and organization information. According to LinkedIn’s current guidance, complete Pages receive 30% more weekly views than incomplete Pages.
YouTube
Useful when educational, demonstration, tutorial, interview, product, or long-form video content plays an important role in your marketing strategy.
Other Platforms
Depending on the business and market, TikTok, Pinterest, X, Threads, or other industry-specific communities may also be relevant.
The correct platform mix depends on your audience—not on which platform happens to be popular this month.
Step 4: Secure Consistent Usernames and Handles
Your username may seem like a small detail, but consistency makes your brand easier to find.
Ideally, use the same or very similar handle across platforms.
For example:
@BrandName
is easier to remember than having:
- @BrandNameOfficial on Facebook
- @TheBrandName2026 on Instagram
- @BrandCompanyLtd on another platform
Before finalizing a company name, search major platforms to determine whether appropriate handles are available.
If your preferred username is unavailable, establish a consistent alternative.
Possible additions can include:
- Official
- Company
- Group
- Country abbreviation
- Industry term
Avoid unnecessary numbers and complicated characters where possible.
Step 5: Prepare Your Logo for Social Media
A logo designed for a website header may not automatically work as a social media profile image.
Social profile images are usually small.
Many interfaces also display them as circles.
Your logo therefore needs to remain recognizable at reduced sizes.
Prepare:
- Primary logo
- Secondary logo
- Icon or symbol version
- Light-background version
- Dark-background version
- Square profile version
- Transparent PNG
- High-resolution master files
- Vector files where available
Do not stretch the logo to fill the available area.
Maintain safe spacing around it.
The objective is immediate recognition.
A professional corporate identity system establishes these types of logo, typography, colour, and implementation standards so the brand remains consistent across digital channels. M4YOURS IT’s Corporate Identity Design service specifically includes visual systems, brand guidelines, digital branding assets, and implementation guidance.
Step 6: Establish Your Brand Colour System
Do not choose social media colours independently from your broader brand identity.
Define a usable palette.
For example:
Primary colour: Main brand colour
Secondary colour: Supporting colour
Accent colour: Used selectively for emphasis and CTAs
Neutral colours: White, black, grey, or other supporting tones
Record exact values:
- HEX
- RGB
- CMYK when print use is necessary
This prevents designers and team members from approximating colours differently.
Consistency matters more than having a large palette.
Step 7: Select Your Brand Typography
Typography has a major influence on visual personality.
Your social media system may include:
- Primary headline font
- Secondary heading font
- Body font
- Optional accent font
Keep readability the priority.
Avoid using too many font families across social posts.
A clear typographic hierarchy makes content easier to scan while helping posts feel connected to the same brand.
Step 8: Design Your Profile Picture
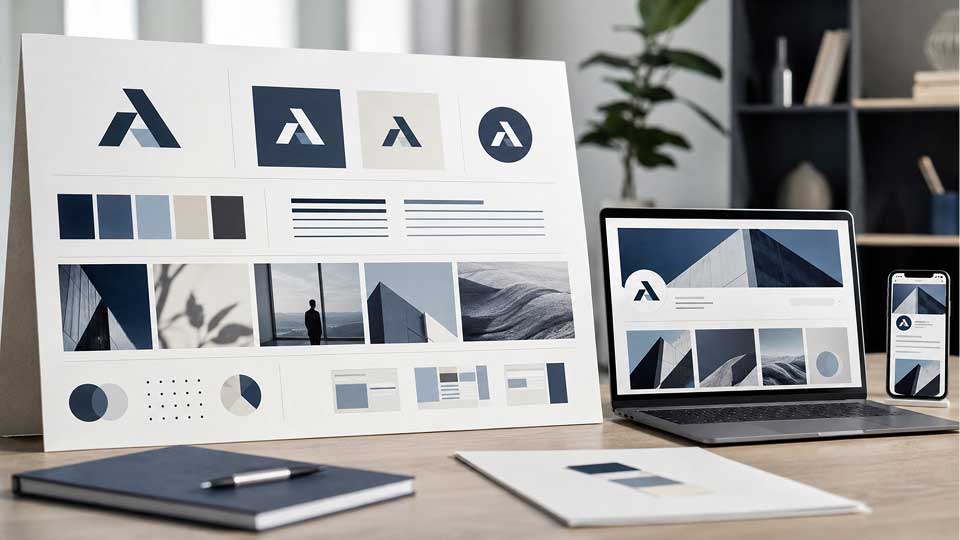
Your social profile picture is one of the smallest but most frequently displayed brand elements.
It may appear beside:
- Posts
- Comments
- Messages
- Search results
- Notifications
- Recommendations
- Advertisements
For a company, a simplified logo or brand symbol usually works best.
Check it at actual social-media size.
If the company name becomes unreadable, consider using the recognizable icon portion of the identity instead.
The final profile image should have:
- Clear contrast
- Proper margins
- No tiny text
- No unnecessary detail
- Clean background treatment
- Strong recognition at small size
Step 9: Create Platform-Specific Cover Graphics
Do not create one banner and blindly resize it across every network.
Platforms display cover graphics differently.
Mobile and desktop interfaces may also crop them differently.
Create individual layouts while maintaining the same visual identity.
A professional cover can communicate:
- Core value proposition
- Primary service
- Product category
- Brand positioning
- Current campaign
- Brand imagery
Avoid turning the banner into a brochure.
A clear message with strong visual hierarchy normally works better than trying to display every service the business provides.
Step 10: Write a Clear Social Media Bio
Your bio should explain the business quickly.
Avoid descriptions filled with generic phrases such as:
“Delivering innovative excellence for tomorrow.”
Instead, communicate something meaningful.
A good business bio normally includes:
- What you do
- Who you help
- Main value or specialization
- Location where relevant
- A next step
Example structure
[Business category] helping [audience] with [main services/outcomes]. [Differentiator]. [CTA].
Different platforms may have different character limits, so prepare:
- Short bio
- Medium company description
- Long company overview
LinkedIn also recommends including relevant terms in a company overview because members can search using keywords.
Step 11: Complete Every Important Profile Field
Do not leave your company profile half-finished.
Depending on the platform, complete relevant fields such as:
- Business name
- Username
- Description
- Website
- Telephone
- Location
- Business category
- Operating hours
- Industry
- Services
- Company size
- Founded date
- Call-to-action options
Check every entry carefully before publishing.
Incorrect contact details are worse than missing information because they can send interested customers to the wrong destination.
Step 12: Choose the Right Call to Action
What should someone do after visiting your social profile?
Possible goals include:
- Visit the website
- Contact the company
- Send a message
- Book a consultation
- Shop online
- Request a quote
- Register
- Download something
- Visit a location
Choose one primary action instead of asking visitors to do everything simultaneously.
Your:
- Bio
- Link
- Banner
- Profile button
- Pinned content
should support that action.
Step 13: Set Up Website and Tracking Links
Do not simply paste links without checking them.
Verify that:
- The page loads correctly
- It is mobile-friendly
- HTTPS is enabled
- The destination matches the CTA
- Contact forms work
- Booking systems work
- Product pages work
Businesses running campaigns should also establish suitable analytics and campaign tracking.
This makes it easier to understand whether social media is actually sending visitors and leads to your digital properties.
Step 14: Develop Your Social Media Visual System
Once profile graphics are complete, establish a system for future content.
Do not design every post from scratch.
Create reusable design structures for common content types.
For example:
- Educational post
- Product/service post
- Promotional graphic
- Testimonial
- Quote
- Case study
- Announcement
- Carousel
- Story
- Short-video cover
- Event
- Recruitment post
A professional social media branding kit gives designers and marketers a framework they can reuse without making the feed look repetitive.
The goal is consistency—not identical layouts.

Step 15: Define Your Photography and Image Style
Brand consistency also applies to photography.
Decide whether your business typically uses:
- Real team photography
- Product photography
- Lifestyle photography
- Corporate photography
- Custom illustrations
- 3D graphics
- Screenshots
- Minimal graphics
- Stock photography
If stock photos are necessary, establish selection rules.
Mixing dramatic corporate photographs, cartoons, random AI artwork, luxury lifestyle imagery, and unrelated stock images can quickly create an inconsistent profile.
Create a recognizable visual direction.
Step 16: Define Your Tone of Voice
Your brand should sound consistent as well as look consistent.
Decide whether your communication should feel:
- Professional
- Conversational
- Technical
- Educational
- Friendly
- Premium
- Energetic
- Authoritative
The correct tone depends on your audience and positioning.
Create simple guidelines for:
- Headlines
- Captions
- CTAs
- Customer responses
- Comments
- Promotional language
- Technical terminology
- Emoji usage where relevant
Your visual identity and verbal identity should communicate the same personality.
Step 17: Decide Your Core Content Pillars
Do not wait until posting day to decide what to talk about.
Create several recurring content categories.
For example, a technology company might use:
- Educational content
- Service explanations
- Project showcases
- Industry insights
- Company updates
- Client success stories
- Team and culture content
A skincare brand might use completely different pillars.
Content pillars help maintain variety while keeping topics connected to business objectives.
Step 18: Prepare Your First Posts Before Launch
An empty profile does not create a strong first impression.
Prepare an initial collection of posts before actively promoting the account.
These might include:
- Brand introduction
- What we do
- Main services
- Why choose us
- Product/service introduction
- Team introduction
- Educational post
- FAQ
- Portfolio or project
- Customer testimonial
- Contact/CTA post
This gives new visitors enough information to understand the business.
Step 19: Select Your Pinned or Featured Content
Your latest post is not necessarily the most useful post for a first-time visitor.
Where platform features allow it, strategically pin content such as:
- Company introduction
- Main service
- Important offer
- Customer success story
- Product guide
- FAQ
- Contact information
Treat featured content like the top section of your website.
It should help visitors quickly understand the brand.
Step 20: Add Authentic Trust Signals
New businesses need credibility.
Use legitimate trust elements where appropriate:
- Real customer reviews
- Testimonials
- Project examples
- Team photographs
- Company information
- Client results
- Certifications
- Partnerships
- Portfolio work
- Behind-the-scenes content
Avoid inventing testimonials, customers, awards, or statistics.
Professional branding helps presentation, but genuine evidence creates credibility.
Step 21: Establish Account Ownership and Security
Brand setup is not complete until account access is properly managed.
Avoid building an important company profile around one employee’s personal access with no backup plan.
Businesses should maintain:
- Clear ownership
- Appropriate administrator access
- Strong unique passwords
- Multi-factor authentication where available
- Recovery email and phone information
- Documentation of account ownership
- Controlled access for agencies and employees
When a team member leaves, review permissions.
Social media accounts are business assets.
Treat them accordingly.
Step 22: Create a Content Approval Workflow
As the company grows, more people may become involved in social media.
Establish responsibilities early.
For example:
Content strategist → Copywriter → Designer → Reviewer → Publisher
Small companies may combine several of these responsibilities.
What matters is knowing:
- Who creates content
- Who checks facts
- Who approves designs
- Who publishes
- Who responds to comments
- Who handles customer enquiries
This prevents duplicate work and unauthorized publishing.
Step 23: Create a Simple Content Calendar
You do not need a complicated 12-month calendar on day one.
Start with a manageable monthly plan.
Document:
- Publication date
- Platform
- Content pillar
- Topic
- Format
- Caption
- Creative asset
- CTA
- Status
- Responsible person
Consistency is easier when the process is documented.
LinkedIn currently reports that companies posting weekly see higher engagement than those posting less frequently, reinforcing the value of maintaining an active content routine rather than abandoning a Page after setup.
Step 24: Test Everything Before Launch
Before actively promoting your accounts, perform a complete review.
Visual check
- Is the correct logo being used?
- Does the profile image crop properly?
- Is the cover image clear on mobile?
- Are colours consistent?
- Are fonts consistent?
Information check
- Is the company name correct?
- Is the description accurate?
- Is the website correct?
- Is the phone number correct?
- Is the address correct?
- Are operating hours accurate?
Conversion check
- Do links work?
- Does the contact button work?
- Does the booking system work?
- Do forms submit successfully?
Content check
- Are initial posts ready?
- Is featured content selected?
- Does the feed feel consistent?
- Are there obvious spelling mistakes?
Do not assume everything works because the profile looks good on one computer.
Test it.
Social Media Brand Setup Checklist
Use this abbreviated checklist before launching.
Brand Foundation
☐ Define target audience
☐ Define positioning
☐ Define value proposition
☐ Establish brand voice
☐ Finalize brand messaging
Visual Identity
☐ Finalize logo
☐ Create profile logo variation
☐ Establish colour palette
☐ Establish typography
☐ Define image style
☐ Create brand guidelines
Account Setup
☐ Select priority platforms
☐ Secure usernames
☐ Confirm account ownership
☐ Enable security measures
☐ Set appropriate administrator access
Profile Setup
☐ Upload profile picture
☐ Create platform-specific covers
☐ Write bio
☐ Add website
☐ Add contact information
☐ Add business information
☐ Configure CTA
Content System
☐ Define content pillars
☐ Create social templates
☐ Establish photography style
☐ Prepare launch posts
☐ Select featured content
☐ Create content calendar
Final Review
☐ Test links
☐ Test mobile appearance
☐ Check spelling
☐ Verify business information
☐ Review administrator access
☐ Confirm analytics/tracking
☐ Approve initial content
Do New Businesses Need a Complete Brand Before Starting Social Media?
Not necessarily.
A startup does not need a 100-page brand manual before opening an Instagram account.
But it should have enough structure to maintain consistency.
At minimum, establish:
- Logo
- Colour palette
- Typography
- Basic positioning
- Target audience
- Tone of voice
- Social profile graphics
- Content design direction
You can expand the system as the company grows.
The important thing is to avoid creating marketing assets without any shared framework.
Should You Hire a Professional for Social Media Brand Setup?
Some businesses can handle basic setup internally.
Professional branding becomes especially valuable when:
- You are launching a serious commercial brand
- Several people create marketing content
- You operate on multiple platforms
- Your business sells premium services
- Brand credibility matters heavily
- You plan to run paid advertising
- Your current branding is inconsistent
- You expect the company to scale
A professional designer does more than produce attractive graphics.
The goal should be to create a reusable system that your company can continue using.
M4YOURS IT’s branding and corporate identity services are designed around this broader principle: building structured identity systems that remain consistent across websites, digital platforms, marketing materials, social media, and business communications.
Build Your Social Media Brand Correctly From Day One
Your first social media post is not the beginning of your brand.
The foundation comes first.
When your positioning, logo, colours, typography, profile graphics, messaging, content templates, account information, and workflows are properly organized, publishing becomes easier.
More importantly, customers encounter a business that appears consistent wherever they find it.
A strong social media setup helps transform individual profiles into a connected part of your larger brand experience.
M4YOURS IT helps businesses develop brand strategy, corporate identity, social media branding systems, creative assets, websites, and digital marketing solutions designed to work together.
If you are preparing to launch a new business or need to rebuild an inconsistent social media presence, M4YOURS IT can help establish the foundation before your marketing begins.
Frequently Asked Questions
Brand setup for social media is the process of preparing your business identity, account information, profile graphics, messaging, content templates, and management structure before regularly publishing social media content.
Prepare your business name, positioning, target audience, logo, colour palette, typography, brand messaging, website, contact information, profile graphics, and content strategy.
Ideally, yes. Consistent usernames make your company easier to identify, search for, mention, and remember.
Choose platforms based on where your target customers spend time and the types of content your company can produce consistently. You do not need to launch everywhere simultaneously.
Yes. Platforms use different dimensions, cropping behaviour, and interfaces. Keep the same brand identity but adapt the layout for each network.
A typical kit may include profile graphics, cover images, brand colours, typography, post templates, story templates, carousel layouts, graphic elements, image guidelines, and logo-usage rules.
There is no universal requirement, but preparing several useful posts before promoting the profile helps visitors understand your business when they first arrive.
Yes. Even a simple guideline covering logos, colours, typography, imagery, and tone can prevent inconsistencies as more content is created.
Your underlying identity should remain relatively stable, while campaigns and content can evolve. Review profile information whenever business details, services, contact information, positioning, or branding change.
Yes. M4YOURS IT provides brand strategy, corporate identity, creative design, and digital marketing services that can help businesses establish a consistent professional presence across digital channels.

